
General
From the idea to the product: the phases of product development through to production readiness
From the idea to the product in five steps: requirements specification, concept, CAD, 3D-printed prototype, pre-series prototype. What each phase delivers and what it costs.
An idea is quickly sketched. A product that works, can be manufactured and stays affordable is something else. In between lies product development. Here is how I divide this path at KANID, what happens in each phase, and what you have in your hands at the end.
Up front, in brief: by “production readiness” in this post I mean the status from which a manufacturer can take over. KANID does not manufacture the series itself. I develop through to the pre-series prototype and hand over the data with which a manufacturer can quote and produce.
Why the sequence matters
Most problems in development projects do not arise in the design, but before it: requirements are unclear, the budget does not fit the idea, or a decisive risk only appears at the third prototype. Every change becomes more expensive the later it comes. A line in the requirements specification (Lastenheft) is quickly changed. Changing a finished assembly means new parts, new drawings and new tests.
That is why I divide the development into two phases. The first clarifies whether and how your idea works. The second implements it. Between the two, you decide whether to continue.
Step 1: Idea — clarify the problem
At the start is not the solution, but the problem. Which task should the product solve? For whom? Under which conditions is it used — indoors or outdoors, with gloves or without, once a month or a hundred times a day?
From these questions comes the Lastenheft (requirements specification): a list of requirements against which every later design decision can be measured. A good Lastenheft is short and verifiable. “Robust” is not a requirement. “Survives a drop from hip height onto concrete” is one.
Step 2: Concept — solution paths and feasibility
In the concept I sketch solution paths and assess them: What is technically feasible? What risks are there? Which bought-in parts come into question, and where can you get them?
The result of phase 1 (concept & feasibility) is concrete:
- Requirements specification (Lastenheft)
- Solution concept and sketches
- Parts list with sources of supply
- Short report on risks
- Binding fixed-price quote for phase 2
Phase 1 takes about 3–4 weeks and costs 1,450 € incl. 19% VAT (1,218.49 € net) as a fixed price. After that you know what the implementation costs, before you commission it. If the concept shows that the idea is not worthwhile in that form, that is also a result — and a clearly cheaper one than a failed prototype. More on the costs is in the post Product development at a fixed price: cost and process. What the Baden-Württemberg innovation voucher funds and what it does not (contract developments are excluded according to the L-Bank information sheet) is in the post Innovation voucher BW: what is funded and what is not.
Step 3: CAD — the design
In phase 2 the concept becomes a 3D model. I design in Onshape, a CAD system in the browser. For you that means: you do not need a CAD licence of your own. You review every design status via a link, rotate the model, take measurements and comment.
Important in this step is that the design is ready for manufacture from the start. A part that looks good in CAD but can only be made with special tooling helps no one. What that looks like in practice I describe in the post Design for manufacture in CAD. A general overview of CAD in product development is in the post CAD design: from the idea to the finished product. Where parts are under load, I check them where needed with FEM in Onshape.
Step 4: 3D-printed prototype — test, measure, improve
The first prototype comes from in-house 3D printing in Filderstadt. That saves time: between a design change and the printed part there is no shipping and no quoting process with a service provider.
A prototype answers a question. Does the hand fit the handle? Does the clip engage cleanly? Does the joint hold? Then it is changed, printed again and tested again. The fixed price of phase 2 includes 2 revision loops, as well as the material for the prototypes as quoted. What a 3D-printed prototype can do, and where it reaches its limits, is in the post Having a 3D-printed prototype made.
Step 5: Pre-series prototype — the status for handover
The pre-series prototype is the status that works and can be manufactured. It includes:
- Drawings (PDF)
- Bill of materials
- STEP data for manufacturers and suppliers
- Access to the Onshape project
STEP and PDF drawings are the usual handover format. Any manufacturer can work with them, regardless of which CAD system they use. The idea and the IP remain yours; the work results transfer after payment or under the agreed conditions.
What still comes between the pre-series prototype and series production
To be honest: with the pre-series prototype a product is not yet on the shelf. Depending on the product, quotes from manufacturers follow, possibly tooling, tests and certifications, packaging and distribution. That depends strongly on the product and the market, and I deliberately give no blanket figures for it here.
What the pre-series prototype achieves: you go to the manufacturer with a tested status and complete data — not with a sketch. That way you get comparable quotes and a reliable basis for the costing.
Examples from our own development
On the References page I show three products that I developed myself and that are sold today in the KANID Factory:
- SoloMeter — a folding-rule holder for motor-vehicle assessors: the surveyor’s folding rule (German: Geometer-Maßstab, usually just called a folding rule) stands freely, without a hand holding it, for photo documentation, for example after a collision.
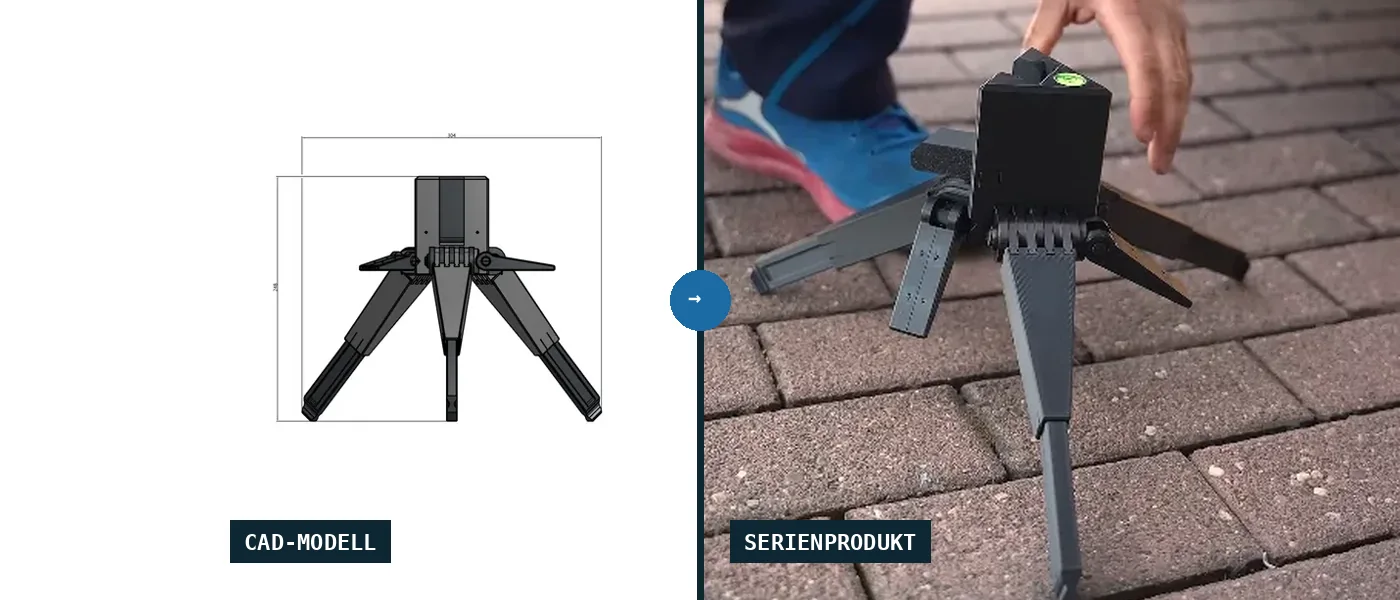
- SoloMeter 2.0 — the further development, developed for a motor-vehicle assessor, with a three-foot system and a built-in vial. The vial shows whether the surveyor’s folding rule is plumb.
- QuerLe — a scissor-type cross-section gauge for electricians: the core or strand goes between the two blades; the cross-section is read off at the bottom. It checks; it does not measure.
All three have gone the path from the idea through CAD and 3D-printed prototypes to a product that can be sold. You can rotate the 3D models in the browser on the references page.
In brief
What phases does product development have?
At KANID, five steps in two phases: idea and concept in phase 1 (concept & feasibility), then CAD design, a 3D-printed prototype and the pre-series prototype in phase 2. Phase 1 ends with a binding fixed-price quote for phase 2.
What is the difference between a prototype and a pre-series prototype?
A prototype answers a question, for example whether a mechanism works. A pre-series prototype is a status that works and can be manufactured — with drawings, a bill of materials and STEP data for manufacturers and suppliers.
Do I need a CAD licence of my own?
No. KANID designs in Onshape. You review every status via a link in the browser.
Does KANID also do series production?
No. KANID develops through to the pre-series prototype and hands over the data a manufacturer can work with: STEP files, PDF drawings and a bill of materials, plus access to the Onshape project.
Conclusion
The surest way from the idea to the product is in clear steps: first clarify the problem and the feasibility, then design, then test. At KANID that means two phases at a fixed price, with a decision in between. The process and the prices in detail are under Services. If you have an idea, write to me via the contact form — a few sentences about the idea are enough to start.
product developmentproduct development processfrom the idea to the productproduction readinessprototype